Friday

Halloween Inpirations Class RECORDED!

 
I'm talking about the Hallweeen Inspirations online class that showed off all of the brand new products! It was recorded and you can see it by clicking here! See, now that wasn't scary at all!

Thursday

You don't have to be creative to CREATE


cre·ate
[kree-eyt] verb, cre·at·ed, cre·at·ing, adjective
verb (used with object)
1.  to cause to come into being, as something unique that would not naturally evolve or that is not made by ordinary processes.
2.  to evolve from one's own thought or imagination, as a work of art or an invention.


I can't sing. I can't really draw, I even tried to knit. But I love and live to create. You don't have to be creative to create something, so I don't want to hear that excuse. There are many opportunities to be inspired by someone or something else.

Where do you start? I know that for my kids (and myself), I look the our corner of the world and say, "ooh, I like that... how would I do that differently?" 

What would do differently in your world today?

Tuesday

Watch & Be Inspired

School starts for my oldest tomorrow and so, summer is closing up shop and I see little yellow leaves falling faster every day.  I'm not to sad though, we've had a very FULL summer! I have updated the Make Something Meaningul page as well as the Watch & Be Inpired page, so I encourage you to check those out today. And to give you sneak peek of what you will find there...
Click HERE to Watch the Recording

Sunday

The Tipping Point

Have you ever read that book?
Yes, The Tipping Point.  If you haven't, you should. It's really good. 
As per Amazon: The Tipping Point is that magic moment when an idea, trend, or social behavior crosses a threshold, tips, and spreads like wildfire. Just as a single sick person can start an epidemic of the flu, so too can a small but precisely targeted push cause a fashion trend, the popularity of a new product, or a drop in the crime rate. This widely acclaimed bestseller, in which Malcolm Gladwell explores and brilliantly illuminates the tipping point phenomenon, is already changing the way people throughout the world think about selling products and disseminating ideas.

That done, let me tell you WHY I say that. I've been working with Heritage Makers as a personal publishing consultant now for three years plus and I love what I am able to do with my photos. But tonight on Pinterest, I saw a GREAT post and I have to re-post/share it with you! From here on out, my comments will be in bright PINK so you'll know my voice.


5 simple ways make the most of your pictures
Last year I teamed up with a group of my favorite bloggers and wrote 5 simple ways to improve your photography. This year I want to give you five ways to use those fabulous pictures you’re accumulating.


1. Make a book. Um... hello? This is WHAT I DO!!! www.myphotofairy.com So many photography printing services offer books now and they are a great alternative to all those 4 x 6 prints you never got around to putting in an album. Make it your goal to print a book every season or every year. I promise you’ll be so glad you did. The easiest way to do this is to either save your favorite images in a folder named 2012 album on  your computer or upload your favorites to your printing company each month. Don’t wait till the end of the year and find yourself sorting through thousands of digital files. You’ll get frustrated and give up. 5.x7, 8x8, my personal favorite 8.5x11 12x12, and more! 

2. Make a calendar. I do this every year and I print several and give them as gifts to family members. We love seeing the new image every month. Yep, I can help you make these too, in 2 sizes and... we can add you own holidays. SWOON!
calendar

3. Print canvases. I fell in love with the gallery wrapped canvas this year and I collected quite a few. They are so easy! They come ready to hang, no frames to worry about. And, they look great on your walls! Is it really possible you can do ALL of this at one website??? Yes! www.myphotofairy.com
wall

4. Join a group project. I’m participating in Darcy’s project 52. It not only gives you a way to share your images, it motivates you to use your camera and practice what you’ve learned.

393470_335839809777069_145165328844519_1266508_108711870_n
 5. Make a personal goal. As a matter of fact... simply search my blog for Yearbook or 53 Fridays to see what I've done in this realm! Whether  you join a Project 365/52 or not, if your goal is to improve your photography, then no matter what level you’re at making a personal goal to learn something new or shoot in a different way is something you should do. Last year I made it my mission to learn to shoot fireworks. I accomplished that goal on July 4 and later, entered that photograph in my county fair and won best of show.

7-4 4

I hope this gives you some ideas to put into practice this year. Enjoy your photography journey and don’t just let those files sit there on your computer, do something fun with them!

It's a good day. 

Most Wonderful Time of the Year & Lunch Box Love Notes

I always loved shopping for school supplies as a kid... new pencils, new Trapper Keeper (LOL), school clothes, but as a parent, I love it even more... here's a little giggle to see why.


I will say though, that with all of the basic supplies, I also like to do a few personalized ones. I have two kiddos, one headed to 7th grade and one headed to 1st and they both love a little message from me during the day. These are super simple to create and I get the Gold Star Mommy Award. That is always a nice feeling.

(Click the titles to view.)
Lunch Box Love Notes - Volume 1
Lunch Joke Cards
Lunch Box Love Notes - Volume 2

What is a lunch box love note?
A lunch box love note is a simple easy way to show your child that you care about him/her. It is a lasting impression that is positive, documented, and builds self-esteem.
There are many benefits to writing Lunch box love notes to your child.

•builds communication
•strengthens bonds
•teaches character
•provides positive affirmations
•lets your child know that s/he is special
•lets your child know that s/he is important
•if your child is feeling lonely it lets your child know s/he is not alone
•praise and appreciating are documented
•you set an example

It is never too late to start either. No matter if you start writing lunch box notes at the first day of day care or when your child is in elementary school, you are giving your child affirmations that will be embedded for life. <3

Friday

Today is National S'mores Day!

That's right... National S'mores Day is August 10th.

So, what are you going to do about it? It's ok if you aren't camping, you can still enjoy that chocolate-sticky-marshmallow-goodness today, without a fire!

I made a card to share the news...
you can view the whole thing here!


Super Easy S'mores Recipe
Ingredients
8  chocolate or regular graham cracker squares
3  tablespoons Nutella
3  tablespoons marshmallow creme
Directions
1. Place graham cracker squares on a work surface; spread 4 squares with chocolate-hazelnut spread. Spread remaining graham cracker squares with marshmallow creme. Place graham crackers, marshmallow sides down, on top of chocolate-hazelnut spread. Place on a microwave-safe plate.
2. Microwave, uncovered, on 100% power (high) for 30 seconds. (If you want to heat the s'mores one or two at a time, microwave one s'more on 100% power [high] for 10 seconds or two s'mores for 20 seconds.) Serve at once. Makes 4 s'mores.
3. Peanut Butter S'Mores: Prepare as directed, except use chocolate graham cracker squares and substitute peanut butter for the chocolate-hazelnut spread.
4. Make-Ahead Tip: Prepare up to 30 minutes before serving. Microwave just before serving.

Nutrition Facts per serving: 141 cal., 7 g total fat (1 g sat. fat), 0 mg chol., 95 mg sodium, 16 g carbo., 1 g dietary fiber, 4 g protein.

Monday

Kinda like being nominated for Prom Queen!

Wow... talk about humbling. I was just updating my Facebook page and while there, I reached my 100th Like! Isn't it funny how social media has become so important to our daily lives? I catch up with my family members, support clients in the message windows, surf Pinterest, network and well... let's admit it - waste time. LOL

But there is a validation that comes from something you are building has a sufficient following. Kinda like being nominated for Prom Queen. Am I overreacting? Perhaps, but honestly, I think I am celebrating.

Wish I had some confetti to throw in the air...

Here is what I did instead:
I have 100 FB Likes! Let's give something away! I will draw from my followers and give the winner a set of the Family Blocks you see features on the cover photo! WOW! I'm so grateful and thankful!         
And the winner is... go like the page to find out! LOL

That was so much fun! I am now on mission to increase my blog readership to 100 by the end of May. I realize that I have my work cut out for me, since I'm at 45 followers. I will do a drawing on June 1st if I can get to that elusive number and I'm going to make sure it's really good. More details to come...
Thank you so much.

Saturday

From the Make Something Event!

Each month, I host an event so asssist my clients in Making Something Meaningful. We always kick off with a beginners class and then offer something tactile. For May, the class was the uber cute Family Blocks. Each guest received the wooden blocks for free! You know you wish you had come! Check the Make Something Event page for details about the next event!


Step 1

Customize your family blocks at my website.
Shameless plug, I know, but there it is.
www.MyPhotoFairy.com


Step 2
Cut and trim each letter to fit. 


Step 3

Prepare your 1x3 Pine board by cutting into (3) four inch and (3) 4 1/2 blocks.

You will also need a glue stick, a brush and modge podge for the next steps.
Step 4Apply glue liberally to the wood, postition and adhere each letter as shown. Use a gift card or another block of wood to "burnish" the paper to the wood. This will smooth out any bumps or air bubbles.
Repeat for each letter.

Step 5
Use a brush to apply Modge Podge from top to bottom to the blocks. This wil seal your project and protect it. Repeat for each letter. After it dries, then apply Modge Podge again from left to right on the blocks. This will create a cross hatch line effect and make it look like canvas.

Creative Tip: Paint your blocks of wood ahead of time to match the prints.

Friday

Once Upon A Time...

For as long as I can remember, I have told stories.

My daughters love them, as they should. Who else's stories should be more revered than their mother's? But there is one little fairytale that captivates them everytime.
Once upon a time, there was a beautiful girl who was loved by all who knew her. She had eyes as blue as a summer sky and a smile that could light up a room.
The story would go on with what girls dream of doing, like riding horses on the beach or walking a tightrope above the Grand Canyon.  Why do stories mesmerize us so?
Is is that we are delivered to a different place while listening to a good story? I think so. Our children believe what we read to them when we kiss them goodnight.

We have an opportunity to weave our very lives into their dreams and make our children and ouselves the heroes in our own stories.

What stories do you tell?

Thursday

Photography follows the law of averages.


My dad used to teach photography at a college in Denver, long before digital cameras. Back in the days of real film. He taught me a valuable lesson which I still use today.

Basically speaking, simply take a bunch of shots to get one awesome one! *laughing* So, let me confess, this photo was the final shot of 17. Not that 17 is a ton, but they were all her jumping up and down. I did get two other shots I liked... Additionally, I have a friend who would KILL ME if I didn't mention that I took this with a Sony NEX-5.

I love what a picture can do. You can capture joy in a single frame and hold it there, close to your heart forever.  

And is that what celebrating life it all about?


Wednesday

My Mission in Life


cel·e·brate
[sel-uh-breyt]  verb, cel·e·brat·ed, cel·e·brat·ing.
verb (used with object)
1.   to observe (a day) or commemorate (an event) with ceremonies, festivities or rejoicing.

life

[lahyf]  noun, plural lives [lahyvz]  ,adjective
noun
1.  a corresponding state, existence, or principle of existence conceived of as belonging to the soul: eternal life.

I recently determined that this is my life's mission; to celebrate life.
I posed the question via Facebook; "How do you celebrate life?" and the answers seemed ordinary, things I had heard before. Which, in effect is the opposite of celebrating. 
What say we kick up our heels with vigor to observe the simpler things in life?  Pour a drink and toast the fact that it's Tuesday!

Let's beat the drum, blow off steam, carouse, drink to, have a ball, let loose, lionize, live it up, make merry, mark with a red letter, paint the town red, party and just raise hell.
Of course, here I am waxing poetic and not giving you any actual examples. Let me amend my post with five ways I celebrate the mundane, everyday bits of my existence... therefore transforming them from mundane to fabulous.
  1. Photograph.
    Really? Yes really. When do we take pictures? Oh yaaaaah.... special occaisions! Now quit complaining and get out your camera.
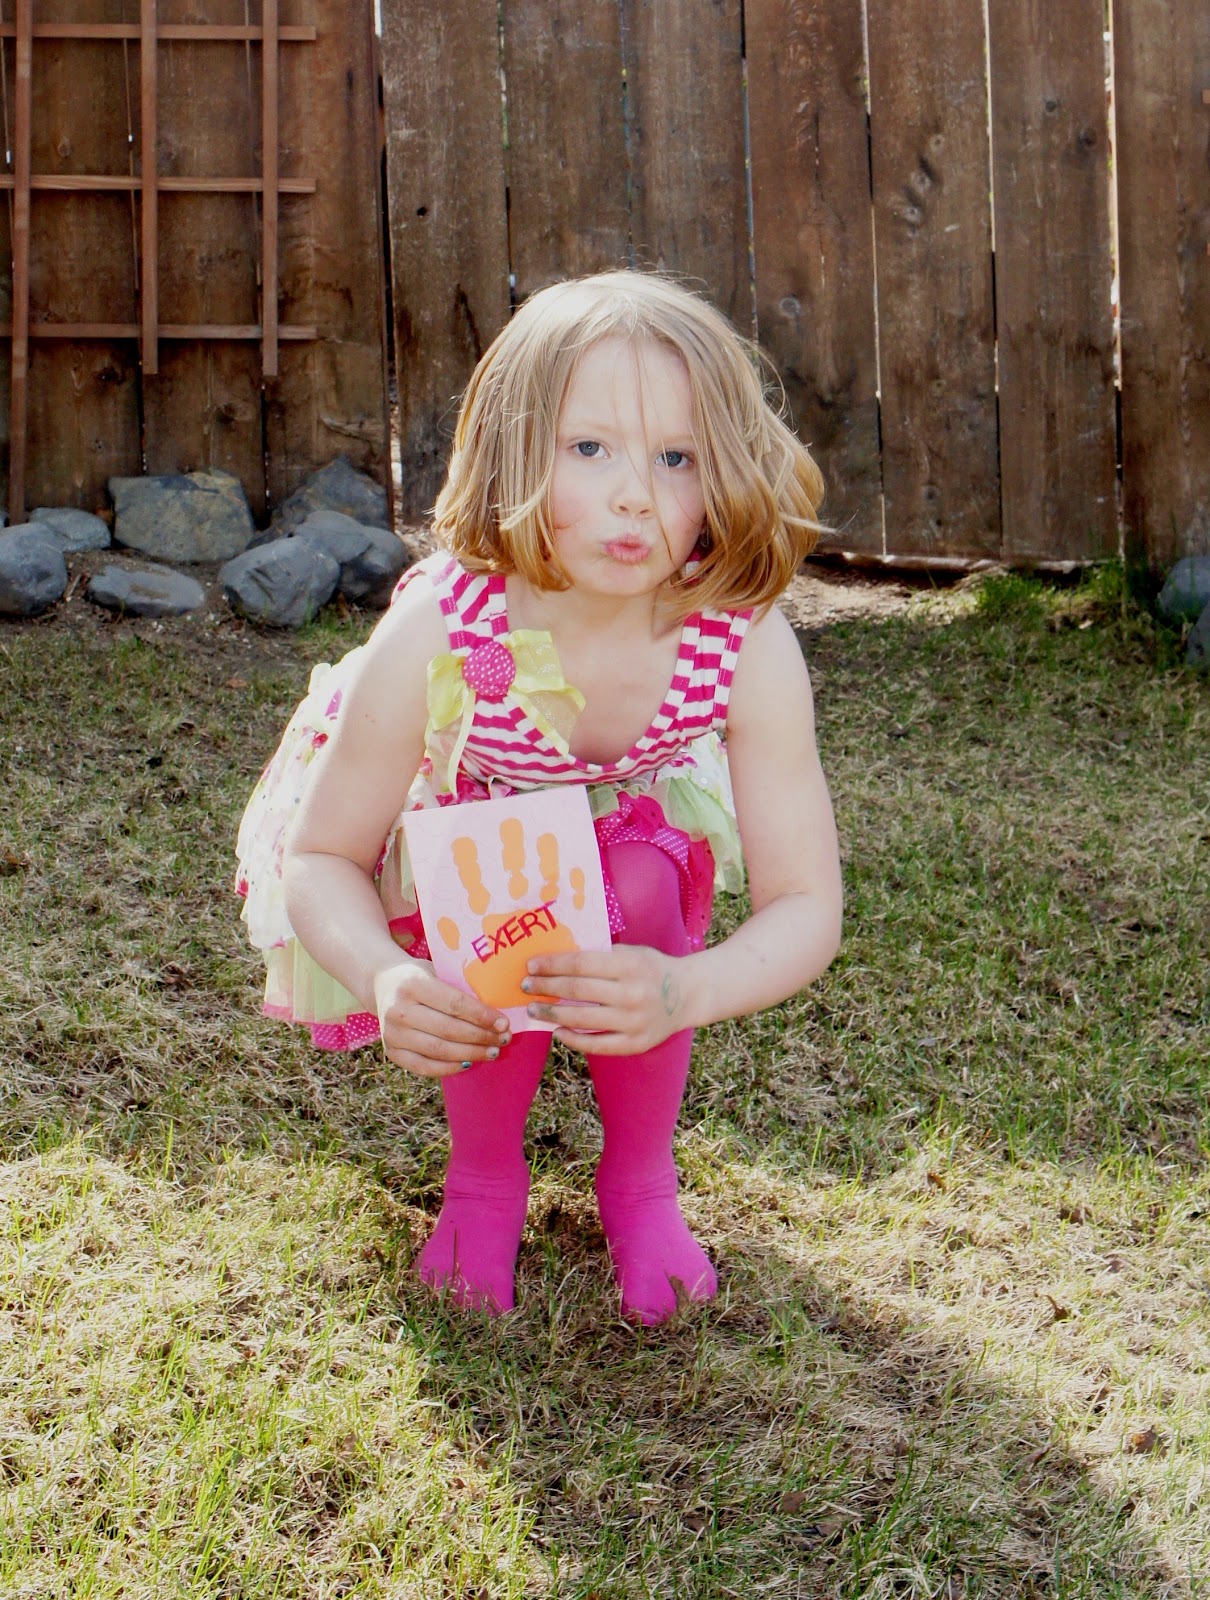
  2. Exert.Physically and mentally if possible! We are designed to train, develop and condition ourselves. So don't just sit there, do something.
  3. Share. Doesn't matter what; share a smile, share your lunch, share your time. When you give someone else a chance to partake in what you have to offer, you feel better.
  4. Talk.To the cashier, to the neighbors, to your cat. Shoot, talk to yourself. Fill in the blank spaces with words that mean something. Talk to express love and hurt and every other emotion.
  5. Create.I can't sing. I can't really draw, I even tried to knit. But I love and live to create. You don't have to be creative to create something, so I don't want to hear that excuse. There are many opportunites to be inpired by someone or something else.

Now, I know it would be easy to say, "Sure, those sure sound ordinary to me." But I double dog dare you to try it. Celebrate your life today. And tomorrow. And the next.  And if I missed one, let me know. <3

Yearbook Season

It's yearbook season and I always love this time of year.
Don't you remember, at the end the end of the year, yearbooks would come out and you would hope your picture was good, look for your friends in the candid shots and then have all your friends (plus the boy you were crushing on) sign your book to save for years later. I know that for me, I very rarely had little more than my standard school photo in the book and I longed for more.
Well, I'm not in high school anymore, but as my daughters' bring home their school annuals, I find myself... longing for more again.  I hear you... I know, I know. "You don't have time". Do you have fifteen minutes a month? Be honest with yourself. You KNOW you have fifteen minutes. Especially if you had a yearbook staff at your beck and call.

I love the whole drag and drop feature, combined with the flexiblity of being able to customize each and every detail... if I have the time.  Here are a few samples and yeah, you could totally catch up.


In just 15 minutes a month (5 minutes to upload the photos, 5 minutes to jot a note or two down and 5 minutes to make sure it's just how you want it) you can create your own yearbook. 

Sunday

Stunning Wall Art - With Your Own Photos!

Searching for the perfect thing to hang on your wall is tricky.
Do you invest in a artwork and then spend hundreds framing it?
Or, go with kitchsy posters in cheap frames?
Or, no art at all?
None of these options work for me! I wanted artwork, but wanted to hang my family photos as well. The look of the school picture, wedding photo gallery in the stairwell is classic, but not fresh.

Of course, you can take those SAME photos and transfer them simply to canvas!
Ok, so here are two 8x10 photos I have from our most recent vacation.


Both photos are wonderful, but what can I do with them other than scrapbook them?
I could take them to a box store, have them scanned and transferred to canvas, but how different is that than just framing the photo?

There are other options available. What I chose to do was digitize the images and then upload them to my Heritage Makers account. There I could create an actual work of art from scratch, using the colors and style of my home to transform a simple snapshot into something wall worthy.

What are you thoughts?

No, not a scrapbook! Before You Were 5

 I am a mother, a wife, sister and friend. I am an artist, a writer, party planner and crazy person.
I am also a personal publisher and with that comes joy. I never thought I would love creating digitally because I am very tactile. Paint in my cuticle, glue in my hair (now there's a vision), but truly, I love creating this way.
When my youngest daughter turned five and I wanted to create a highly personalized board book for her that documented the previous years of her life. No, not a scrapbook. A professionally bound book, glossy, real pages, published book!

I started with a template and altered it to fit my needs, much like a dress maker alters a pattern to fit a person. Here is the original template:

designed by: Kari Pieratt
8x8 Board Book
Template ID: 50666

But, I don't have a boy, so I began the simple drag and drop process of making the book for my daughter. Here is the finished project.


I am delighted with the book, as is my daughter! The postman delivered it to us in the middle of her birthday party (how's that for perfect timing?!) and she stopped everything to examine every page carefully. Be still my mom heart. <3

Friday

Bouquet of Love & Memories!

Roses are red,
Violets are blue,
This bouquet of flowers,
I made for YOU!


Super simple to create and really inexpensive, you could create this gift in 15 minutes. Brilliant for a teachers gift too!  The flowers are on a 12x12 digital print (see below) that are just a drag and drop to do the photo. Easy to do with traditional scrapbook supplies as well, but it would cost you more that way. 


Super easy... get the flowers, pix and assemble. Then just adhere to shisk-kebob skewers and poke into floral foam in a vase. Oh, let's make one today!

Monday

Tangible Proof of God's Love!

So here's a cool thing.
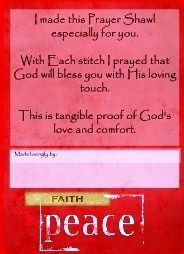
Many churches around the country are wrapping "tangible proof of God's love" around those who need it most. Tangible proof? You mean something I can hold? Absolutely!

Introducing the prayer shawl!

Knitters work on a shawl in the softest of yarns to create a cozy wrap for hospital patients, women in crisis, those making long treks across the globe, new mother's with babies in the NICU - this list goes on and so does the ministry!  Those creating the shawl pray for the recipient while each stitch is cast. Since a shawl requires focus and time, there is a lot of love put into each one.

Each shawl from St. John United Methodist church will now come with a small card signed by the creator, making the gift that much more personal.


Cards created by: Jennifer Stratton - http://www.myphotofairy.com/ or (907) 350-1755 and retail for $25 for 54.


Tuesday

What is your Legacy?

This summer has been a difficult one for me.
Over Memorial Day weekend, I lost my dear Gramma Summer and just last week, my darling Grandmother Grace passed away. I was very close to both of them and each has influenced me over the course of my 38 years.  I alternate between joyful rememberance and heartbreaking sadness over the profound loss I feel.

In my grief, I have begun writing their legacy down. After all, as a personal publisher, isn't that what it is all about? I want my girls to know the incredible women that I knew and unless I pass that down to them, those women will be lost. I could not bear that.

Using a template from the extensive Template Gallery at http://www.myphotofairy.com/, I have begun to memorialize each of these dynamic women and I want to share this with you. To the right, you will see photos of my loved ones and below, you will see the beginnings of their legacy books.

With Story Maps to guide you, documenting someone's life doesn't have to be an overwhelming process. Step by step, you can have a leather bound, coffee table style book that will be almost as revered as the person it is about. But I suggest you start now. Don't wait until they are gone. Start today.
To view the book at it's best, click FULL SCREEN.

If you are ready to begin a Legacy Book, visit http://www.theyoulibrary.com/ today. 

Wednesday

Puzzle Blocks are coolio!


Super fly project idea! Puzzle blocks have been around for centuries and this one was a delight to create.

You can make the final puzzle any size, but I'm loving the 6x6 size; nine 2 inch blocks. Here's how to do the project.

The cubes have six sides, so you'll need to use two 12x12 sheets. You can create them with scrapbook supplies or my preference, with in Heritage Makers Studio; four to a page. Add words, pictures and art until you have a complete square for your puzzle.

Then publish and when the sheets arrive just ten days later, separeate and adhere to your blocks with Modge Podge or puzzle glue. Way cool and what a fun gift this would make! Here are some of my other sides... soon to arrive!

Friday

Holy cowlita! Create house numbers?!

This completely simple and beautiful project knocked my socks off. I feature the work of Deb Jones from time to time and I truly can't wait to see what she comes up with next! Today's offering: Address Numbers!

How in the heck did she do this?
A 12x12 digital scrapbook page and some Modge Podge!
Choose the tile holder you want to use and buy the appropriate size tiles to fit. Here are some websites to find tile holders:
http://www.thelasershoponline.com/metaltileframe.html
http://www.directfrommexico.com/mi2119-2.html
http://www.simply-sublime.com/Tumbled_Tile_Plaques.htm
http://www.thefind.com/garden/info-address-tiles
You can find 3x3 tiles inexpensively at your local hardware store.
Then, login to your Heritage Makers Studio account and start a new project. Add your photo background to fit the tile size and publish. These are 3x3, so twelve numbers would fit on one page!
When your page arrives, cut the 6x squares apart and modge podge to the ceramic tile. I would suggest a sealant as well, since they will weather the elements. Considering that 1 digitally created page is merely $4, these are a STEAL! Way to go Deb! Keep those ideas comin'!

Thursday

Put that on a coaster, will ya? Don't have a coaster? Let's MAKE SOME!

It’s the digital scrapper and home crafter’s perfect project. And with Heritage Makers, this project has never been easier. It’s time to get rid of those old, gross-looking coasters and replace them with personalized ones. You can include your living room’s color scheme and even your family photos.

Here’s what you need:
•Blank wood or chipboard (or another material if desired) coasters – You can get these from a craft store. For this project I used 3×4 inch coasters with rounded corners from Robert’s Craft online.

•Scrap page (for this project I used a 12×12 scrap page) which is in the template gallery!

•Mod Podge

•Spray sealant

•Wood/craft paint (any color)
Get started:

1.Design your coasters in Studio on a scrap page (whatever size works best to fit all your coasters on a page or two).

2.Paint the bottom and sides of your wooden coasters. You may also paint the top of the coasters if you are planning on not covering the entire surface with your digital-designed coasters.

3.Once you have your printed scrap page, cut the digital-designed coasters out.

4.Using Mod Podge, glue each digital-designed, cut-out coaster onto the top surface of your wooden coasters.

5.Let the Mod Podge dry.

6.Seal your coasters using a spray-on sealant. (Note: You’ll want to use the sealant in a ventilated area.)

7.And voila. You now have fun coasters you’ll be proud to display in your living room!